Making my own stamped leather morale patches
I'm obsessed with morale patches.
When I leave the house I typically have 2 on me at least: One on my hat (assuming I'm wearing a hat that day), and one on my EDC bag (a 5.11 Tactical 24hr pack that has held up to some shit, let me tell you).
I change the hat one up every time I leave the house; As I write this out at my favorite coffee shop I'm wearing my "We will tread where there is inequality" patch (which can be purchased from the original artist here) on my hat, and almost always have my pride patch on my bag.
I've been looking into ways to create my own morale patches; At first I was going to have them made by a 3rd party, but the costs are prohibitive, especially for a small run.
Eventually I looked into 3d printing; I've seen folks make some using TPU in a 3d printer, but the more I looked into that, the more I didn't really like the idea (it's hard to get them smoothed out to look good in my opinion).. But in researching that, I discovered leather stamping.
Leather stamping is super easy, and relatively cheap, too, so I'm going to outline my process for you all.
First, materials: I use ~2mm thick veg-tanned leather. this is critical: Using leather that's already dyed isn't going to work, and 2mm thick is just right for this process.
I also have 2 pieces of solid wood, and 4 hand-tightened vises (with a twist handle); You can use a bench vise, of course, but it'll need to be a pretty big one, not one of the cheapies on Amazon, so you can get enough tension to stamp the leather.
And, aside from a 3d printer and some PLA filament, that's the bare minimum needed. I use a metal ruler with grip tape on the bottom plus an x-acto knife to cut the patch into shape after stamping, and also have some industrial strength hook & loop with adhesive for the backing.
You can, of course, dye & treat your leather after the stamping process, but there's plenty of info there that I don't need to go over it here.
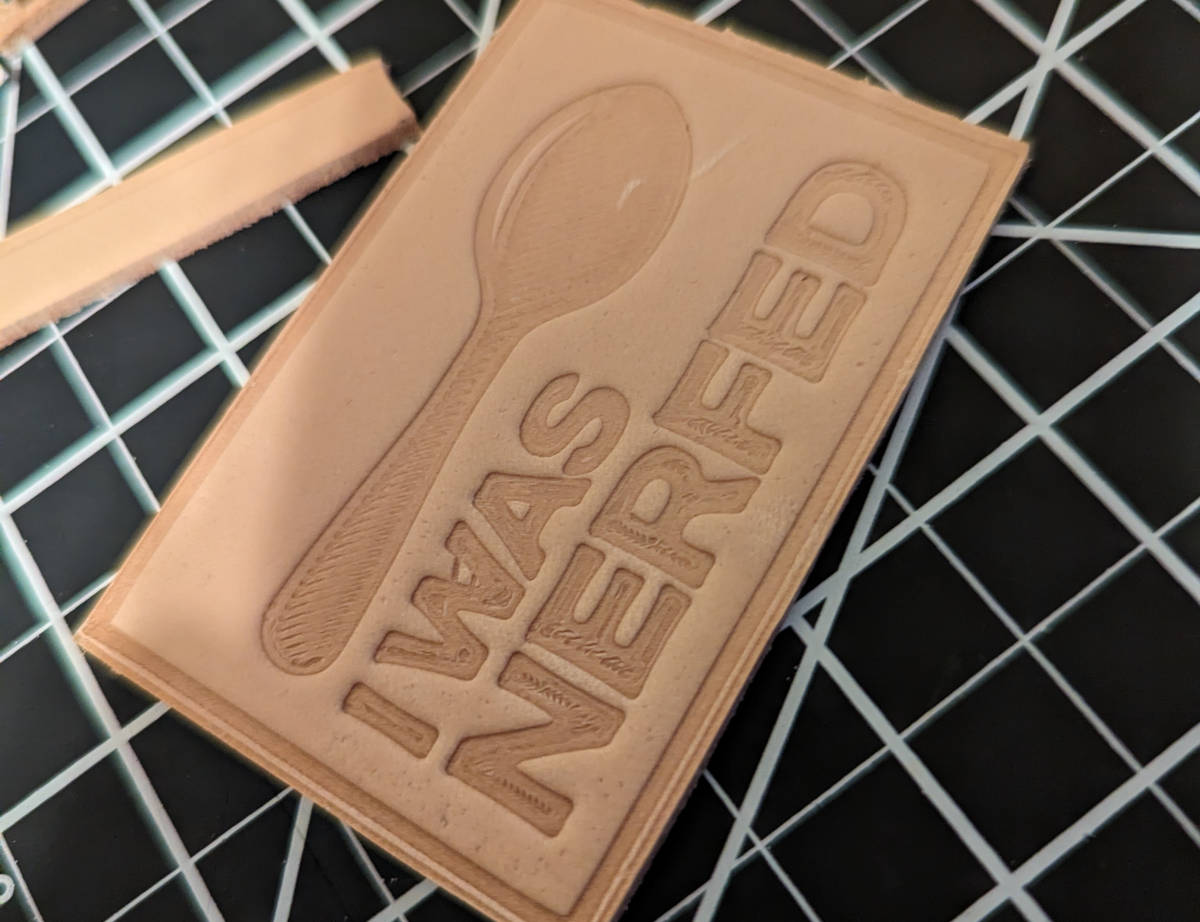
Here's what I did to get the above results:
First, I designed my stamp; I did the core design in Inkscape (since I can run that on any of my devices), and imported that SVG into Blender to make my stamp itself. Feel free to use whatever modelling tools you like for this; I extruded it a fair amount, and ensured I had a solid base as well. The base I extruded to about 2mm, and the actual stamp I extruded to 3mm.
I popped it into Cura (making sure to scale it properly) and printed using default settings; for a 3x2 morale patch you really don't need to mess with the infill or anything.
Once printed, there is one option step to take: You can smooth it out (using whatever process you prefer) in order to remove the layer lines that will come through in the stamp (which you can see above), but I personally am not bothered by them (and actually like them on the spoon itself).
You'll then take your leather, cutting out a chunk larger than what you need (to avoid getting paranoid about centering on the stamp), and soak it in lukewarm water.
I let it get really nice and soaked; 30 seconds in running water should be fine. It should feel soft and supple at this point.
I then take the wet leather, place the stamp on it, and sandwich both between my pieces of wood, centering it as best as I can.
Once that's in place, I use my vices around the 4 edges to apply an even distribution of pressure, tightening them as much as I can by hand (without hurting myself). If you're using a bench vice, just make sure you place it centered inside the vice itself; if you have it placed to the edge of the stamp it'll end up stamping uneven.
I let it sit for 20 minutes, just to ensure I get a good quality stamp, and then I pull it out, cut it down to size, and.. Boom!
You now have a custom leather stamped morale patch.
I'll dye & weather-treat it once it's fully dry, and then will apply the velcro backing.
You can do a lot of great stuff with 3d printing, too; I've also developed a method for gilding metal leaf on leather using 3d printed stamps, too, which allows for some additional fun (and this can be combined with the stamping process, too). I've got a distressed pink patch that says "Hot Mess" that gets a lot of giggles when I wear it out on the town.
If you like the idea of getting one of these patches (I have a number of designs ready), I am considering selling them in the future, so keep an eye out for more here!